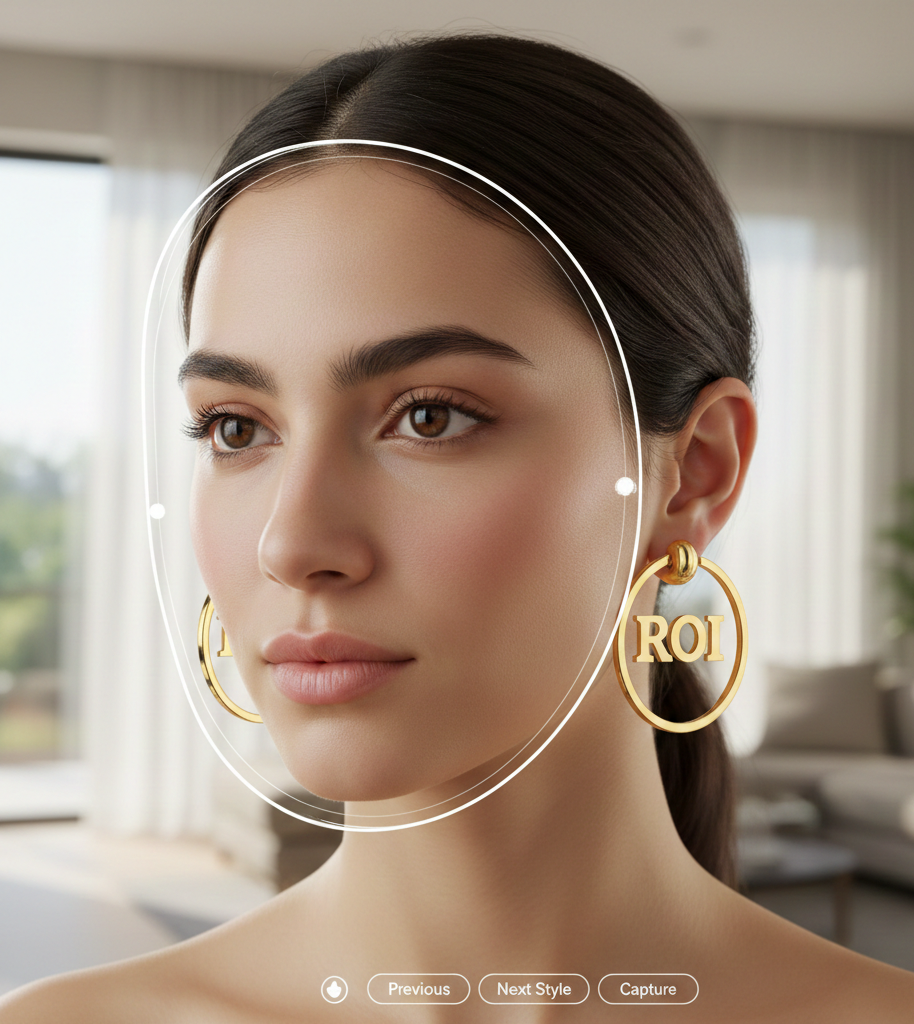
Introduction — earrings virtual try on in a nutshell
Earrings virtual try on helps your customers see how studs, hoops, and drops look on their own ears using a phone camera or an uploaded photo. In this guide you’ll learn what virtual try on for earrings is, why it matters for shoppers and sellers, concrete placement and UX tips, and a step‑by‑step, zero‑code rollout you can launch with a shareable link from Try It On Me — try a live demo here.
Quick hook: retailers that add realistic AR try‑ons report dramatic engagement and confidence gains — which is why offering a browser‑based, linkable experience is one of the fastest ways to reduce uncertainty and lift sales.
Section 1: What is virtual try on for earrings?
What is virtual try on for earrings? Plainly, it’s an augmented reality (AR) system that places a virtual earring onto a live camera view or uploaded photo so a shopper can preview fit, size, and style on their own ear before purchasing. For a clear technical overview of how jewelry VTO systems detect ears, anchor assets, and render realistic metals and shadows, see Picup Media’s explainer.
Two common rendering approaches
2D overlays: simple image layers positioned over a photo or video. Fast and light, but flat and less convincing.
AR 3D VTO: a dynamic, three‑dimensional render anchored to face/ear landmarks that responds to head movement, lighting, and occlusion — this is what people mean by earrings AR try on. See a guide to choosing 2D vs 3D: 2D vs 3D for earrings.
Core technical components (plain English)
Face/ear detection: finds the earlobe and ear structure in the camera feed.
Landmarks: precise anchor points on the ear/face that keep the earring aligned as the user moves.
Scaling: adjusts the earring’s size so it appears proportional to the ear.
Occlusion: hides parts of the earring behind hair or ear angles so the result looks natural.
Rendering: simulates metal reflections, finish, and shadow for realism.
Deployment options and practical implications
SDK/API integration: best when you want fully native app control and custom analytics, but it requires engineering time, app updates, and ongoing maintenance.
Link‑based WebAR (no‑code): runs in the browser and is instantly shareable by URL, so marketers can add try‑on links to product pages, ads, SMS, and social without developer work. For browser AR basics and device support, see WebAR basics. Try It On Me is built around this link‑based model (tryitonme.com). For PDP embedding patterns and Shopify examples, see Shopify PDP patterns.
Section 2: Why earrings virtual try on matters — benefits for shoppers and retailers
Benefits for shoppers
Confidence: seeing the earring on their own ear reduces uncertainty about scale and style. See a technical overview at Picup Media.
Faster decisions: a quick try‑on reduces browsing friction and shortens the path to purchase.
Social proof: easy capture and sharing options let shoppers show friends and get feedback before buying.
Benefits for retailers
Higher conversion: AR experiences demonstrably increase purchase intent and engagement; see industry writeups at Picup Media and ROI examples at cermin.id.
Fewer returns: customers can assess size and fit virtually, reducing “doesn’t look right” returns.
Bigger baskets: shoppers who try multiple items are likelier to add complementary pieces, increasing AOV.
Better ad performance: interactive try‑before‑you‑buy ads convert better than static creatives; see a brand example at PRMAL’s VTO example.
Faster time‑to‑market: link‑based VTO removes heavy engineering cycles so you can test quickly with real SKUs — tryitonme.com enables link sharing and no‑code deployment.
Measuring success: track click‑to‑try, try‑to‑purchase conversion, AOV lift, return rate, session time, and share rate. Treat early results as directional and optimize iteratively.
Section 3: Use‑case examples and where to put earrings online try on
Where to place the try‑on link for maximum impact:
Product Detail Page (PDP): primary placement — a “Try On Now” CTA next to “Add to Cart.” Example flow: PRMAL’s VTO flow. For Shopify PDP patterns and microcopy examples, see cermin.id.
Category and carousel thumbnails: let shoppers preview multiple styles without opening each PDP.
Paid social & organic posts: include the shareable link or a deep UTM to a landing page with the try‑on CTA.
Email & SMS: “Try these new hoops” links create an immediate, personal experience.
In‑store QR: place QR codes beside display pieces so customers can try items privately on their phones; tryitonme.com links work directly in mobile browsers.
Post‑purchase flows: invite customers to try coordinating pieces and encourage repeat purchases.
Mini scenarios (concrete flows)
PDP flow (hypothetical): shopper taps “Try On Now,” allows camera access, sees the hoop on their ear, then adds to cart.
Instagram ad (realistic): a Reels ad links to a tryitonme.com demo; user taps, tries item, and shares a screenshot.
Cart recovery SMS: “Still thinking? Try it on” with a direct try‑on link that brings them back to purchase.
Section 4: UX & design considerations for earrings AR try on
UX goals: accuracy, speed, simplicity.
Accurate scale: the earring must look proportional to the ear. Use scaling presets and allow small manual adjustments. See technical background at Picup Media.
Realistic placement & occlusion: model should sit naturally on the lobe and respect hair or partial obstruction.
Fast flow: minimize steps between clicking CTA and seeing the try‑on — request camera permissions only when needed. For browser AR performance guidance, consult web.dev/ar.
Minimal steps: a 1–2 tap flow keeps users engaged.
Visual fidelity: metals, lighting, and finishes
Lighting & reflections: realistic metal reflection and specular highlights are essential. Use environment‑aware rendering where possible.
Multiple finishes: allow color/metal toggles (gold, silver, rose) and reflect those options in thumbnails and the try‑on UI.
Controls and features
Left/right ear toggle and mirror view.
Size slider or preset sizes (small/medium/large).
Multiple piercing support: placement in first, second hole, etc.
Capture & share: save image or share to social with prefilled copy.
Onboarding & permissions copy
Use clear microcopy such as “Allow camera to try these on — no photos saved.” Explain how to position head and hold still. For privacy and camera best practices, reference platform guidance at Picup Media.
Accessibility & fallbacks
Provide alt text for images and captions for any video/GIFs. Follow W3C guidance: W3C accessibility.
Keyboard and screen‑reader support for non‑visual flows where possible.
2D image fallback for older devices or restricted browsers.
Performance strategies
Progressive loading: show a lightweight placeholder while high‑fidelity assets load.
Bandwidth detection: deliver lower‑poly models on slow connections. See web.dev/ar for guidance.
Privacy note: use clear copy stating whether images are transient and if any processing happens server‑side. If you don’t store images, say so explicitly — see platform docs at tryitonme.com.
Section 5: How to implement earrings virtual try on fast
Two implementation paths:
SDK/API: customizable and integrated, but requires engineering resources and maintenance.
Link‑based WebAR (recommended for speed): no dev work, shareable links, immediate market testing. WebAR basics: web.dev/ar. For a case of a link‑based rollout, see PRMAL.
Step‑by‑step zero‑code checklist using tryitonme.com
Prepare product assets: front/side photos and high‑quality 2D renders plus metadata: size, weight, materials.
Upload to tryitonme.com: log in to the dashboard and upload assets; the interface is designed for non‑technical users (tryitonme.com).
Configure variants & scaling presets: set left/right ear presets, metal finishes, and size presets.
Generate shareable product link per SKU: create a unique try‑on URL for each SKU.
Place the link across channels: add to PDP CTA, social ad creative, email/SMS campaigns, and QR codes for in‑store use. Guides for WooCommerce: cermin.id.
QA test: test iOS/Android browsers, multiple skin tones, hair styles, and piercings.
Track with UTMs & analytics: append UTM parameters to measure click‑to‑try and downstream conversions; the tryitonme.com dashboard offers metrics.
Recommended CTA examples: “Try these earrings on”, “See how they look on you”, “Try‑on link”.
Section 6: Measurement, A/B testing, and KPIs
Key KPIs to track:
Click‑to‑Try Rate (Try clicks / PDP views)
Try‑to‑Purchase Conversion
AOV for users who tried vs non‑tryers
Return Rate (compare pre/post rollout)
Session Duration and Share Rate
Suggested A/B tests
PDP with vs without try‑on link (measure conversion lift).
CTA text test: “Try these earrings on” vs “See how they look.”
Creative test: animated demo GIF vs static thumbnail. Use Google Optimize for experiments: Google Optimize.
Link try‑on clicks to your analytics via UTM tags and monitor in your dashboard (tryitonme.com).
Section 7: Best practices & common pitfalls
Best practices
Prioritize realism for premium products: accurate scale + clean reflections.
Speed matters: keep try‑on flow under a few seconds to load; use progressive loading and 2D fallbacks (web.dev/ar).
Clear microcopy for privacy and camera permissions.
Track everything: set UTMs and monitor try‑on metrics from day one.
Common pitfalls to avoid
Mis‑scaled models that undermine trust.
Ignoring multi‑piercing use cases.
Poor onboarding that leads to dropoff.
No analytics — you can’t iterate without data.
How tryitonme.com helps: provides prebuilt scaling presets, device‑optimized rendering, and built‑in analytics for quick insights (tryitonme.com).
Section 8: Examples & inspiration
Recommended example flows:
PDP Try‑On: prominent “Try On Now” button; modal or new tab with camera permission and left/right toggle — example inspiration: PRMAL.
Instagram/TikTok Ad: 15–30s clip showing the try‑on experience; CTA links to tryitonme.com.
SMS Blast: “Try these new hoops” + try‑on link.
In‑store QR: QR code beside a display leads to the same link for private try‑ons (Reeds example: reeds.com).
Suggested visuals for the post: hero GIF (15–20s) showing mobile try‑on (alt: “earrings virtual try on — phone user trying on gold hoop”), screenshots of dashboard/upload, generated link, PDP CTA, mobile UI, and a short demo clip (15–30s).
Section 9: SEO & keyword placement plan
Primary keyword: “earrings virtual try on” — place in Title, first paragraph, and at least two section headers.
Secondary keyword: “what is virtual try on for earrings” — use as Section 1 header.
Variations: “earrings AR try on”, “earrings online try on” — distribute across UX, implementation, and use‑case sections.
Suggested meta tags
Meta title (≤60 chars): Earrings Virtual Try On — Try Before You Buy
Meta description (150–160 chars): Add earrings virtual try on to your PDPs and social ads to boost confidence and conversions. Try a live demo on Try It On Me.
Suggested internal links (use these anchor texts):
A: It’s an AR feature that overlays a virtual earring onto a live camera view or photo so shoppers can preview fit, scale, and style. See a technical overview: Picup Media.
Q: How accurate is earrings AR try on?
A: Accuracy depends on asset quality, scaling presets, and landmark detection; modern systems can be highly convincing when configured correctly. See Picup Media for details.
Q: Can I add earrings online try on to my product pages without a developer?
A: Yes — link‑based solutions like Try It On Me are designed for zero‑code deployment via shareable URLs.
Q: Do virtual try‑ons store customer photos?
A: Platforms differ. Best practice is to state clearly whether images are transient and not stored. See platform pages or ask the vendor; tryitonme.com provides platform details.
Q: Will try‑on links work on Instagram/TikTok?
A: Shareable browser links work from many social platforms; users tap and the link opens in their mobile browser. Some platforms route links through in‑app browsers — test before launch. See tryitonme.com.
Q: How does VTO affect returns and conversions?
A: VTO typically improves purchase confidence which reduces returns and increases conversion; see industry writeups at Picup Media and the PRMAL example at PRMAL.
Closing / CTA — take the next step with earrings virtual try on
Earrings virtual try on closes the gap between browsing and confidence. If you want a fast, no‑code rollout, try a live demo and generate a shareable link at Try It On Me. Next steps: sign up, upload one SKU, and test the link in your PDP and a social ad.
Why tryitonme.com is the Right Fit for Your Business
No‑code, link‑based deployment — no SDK or heavy engineering required (tryitonme.com).
Fast setup and shareable product links for every SKU (tryitonme.com).
Platform features for jewelry VTO: scaling presets, device optimized rendering, and analytics (tryitonme.com).
Built for commerce: easy placement across PDPs, ads, SMS, and in‑store QR.
Book a Demo.
Visual & assets plan
Hero GIF/video (15–20s): phone user trying earrings — alt: “earrings virtual try on demo on phone”.
Screenshots (3–4): dashboard upload, generated link, PDP CTA, mobile try‑on UI — include captions with target keywords.
Short demo video (15–30s): click link → camera permission → try‑on.
Infographic: benefits and deployment options.
Accessibility: ensure descriptive alt text and captions that include “earrings virtual try on.”
Promotion & distribution suggestions
Social: short demo clip + blog link + try‑on link (use UTM campaign tags).
Email: subject example — “Try these new earrings on — see them on you” + try‑on link.
Paid social: promote demo link with UTM: ?utm_source=facebook&utm_medium=ad&utm_campaign=VTO_launch.
Repurpose: LinkedIn case study post and Twitter threads highlighting results.
Tracking reminder: append UTM parameters to every try‑on link and capture events in your analytics and tryitonme.com dashboard.
Internal notes & editorial checklist
Ensure exact phrases appear at least once: “earrings virtual try on”, “what is virtual try on for earrings”, “earrings AR try on”, “earrings online try on”.
Cite Picup Media for technical explanations: Picup Media.
Use WebAR and accessibility references where relevant: web.dev/ar and W3C.
Link to Try It On Me for demo and product references: tryitonme.com.
Mark any platform SLA or exact turnaround claims as (no reliable source) unless documented on the vendor site.
Run readability to target Grade 8–10 and ensure all visuals have alt text with the primary keyword.