
Watches Try On WooCommerce: A Complete Guide to Embedding Virtual Try‑On for Watch Ecommerce
Quick Summary
- Use a link-based/no-code approach (e.g., tryitonme.com) for the fastest launch without an SDK.
- UX recommendation: display a “Try On” button on the PDP and open the VTO in a slow-loading modal iframe.
- Prepare one link per SKU/variant and map the link → SKU in function.php or a shortcode.
- Follow the QA checklist (accessibility, CSP, analytics, cross-browser, and mobile) before production.
What Is Virtual Try‑On (VTO) and Why It Matters for Watches
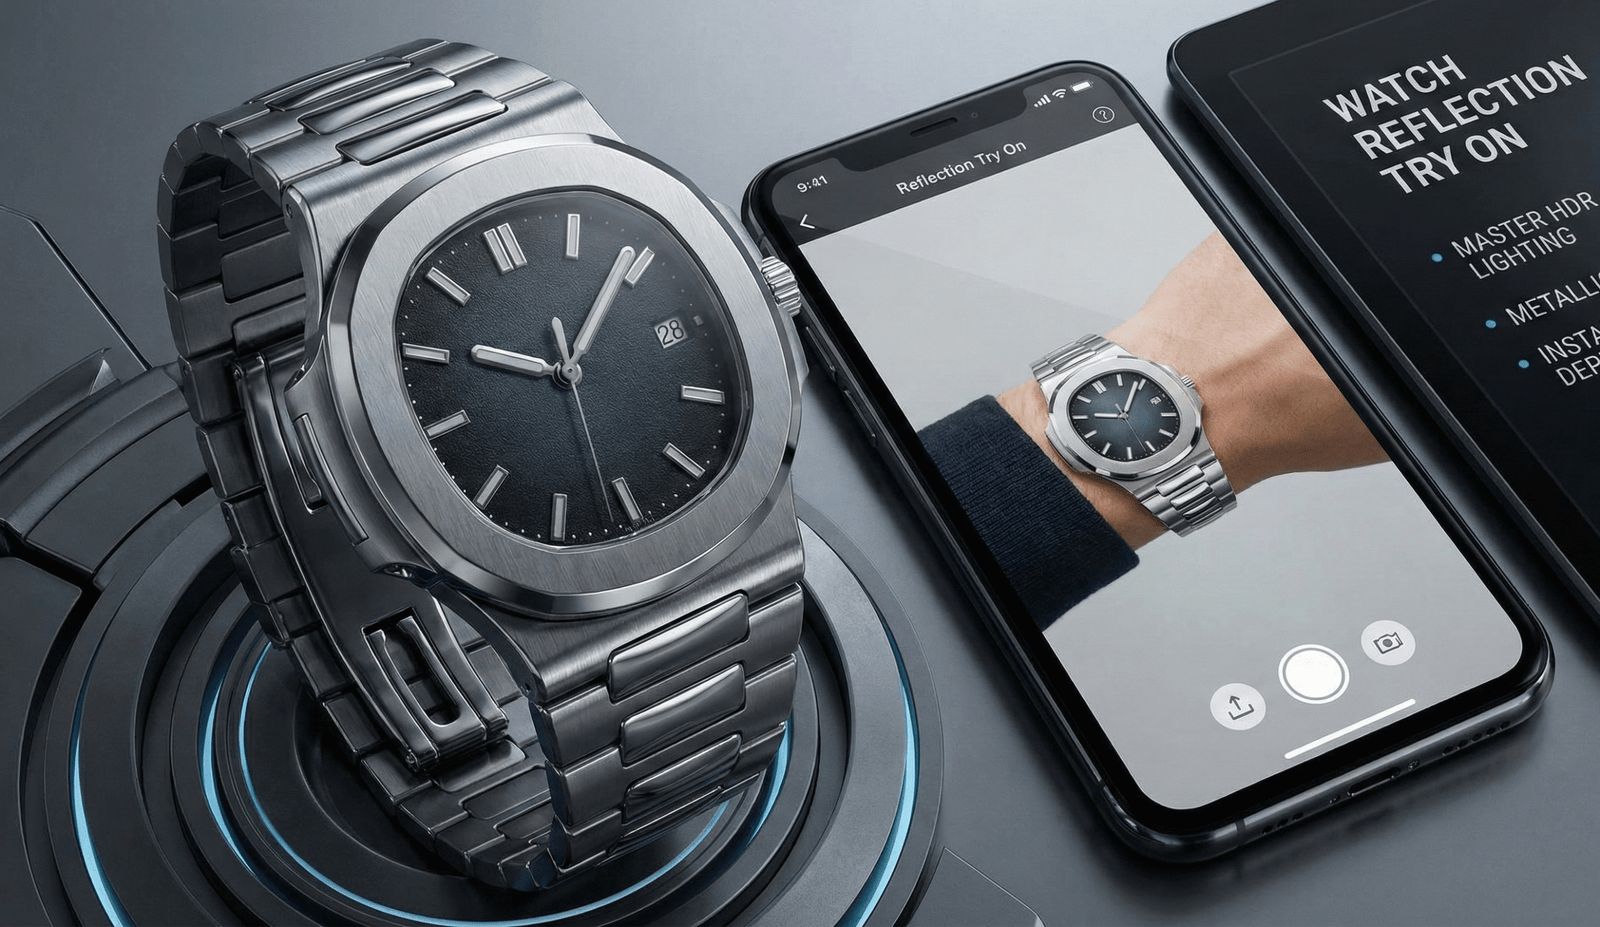
Virtual try‑on (VTO) replaces or augments static photos with an interactive visualization that shows how a product appears on a shopper’s body or photo. For watches, VTO gives customers a realistic sense of scale (e.g., how a 40mm case sits on a wrist), styling with outfits, and a context that plain product photos cannot reliably convey. For details on realistic rendering, HDR lighting, and metallic PBR for watches see the article on watch reflection & try‑on.
Why this matters for watches:
- Customers can judge proportion and style in context (on their wrist), reducing uncertainty.
- VTO is interactive and attention‑grabbing, increasing engagement time on your PDP.
Note: specific uplift/return reduction statistics should be cited from third‑party studies when used — if you want to compare vendors’ case studies, look for vendor reports or academic research.
Why a Link‑Based, No‑Code Tool Works Best for Watch Merchants
A link‑based, no‑code approach like tryitonme.com simplifies launch and ongoing maintenance:
- Zero SDK/API integration — no heavy plugin installs or backend work.
- Cross‑channel links — the same try‑on URL works on web PDPs, social ads, direct messages, and support chats.
- Fast turnaround — tryitonme’s team/AI handles AR processing; links are generally ready in under 3 business days.
- Simple scale — generate one link per SKU/variant and map it to your product catalog.
Onboarding steps (exact): 1) purchase a 6‑month package by SKU count; 2) send standard product photos; 3) tryitonme team/AI processes AR; 4) receive unique try‑on link(s). To explore a demo or generate links, visit tryitonme.com. Pricing details & plans: tryitonme pricing for accessories.
Prep & Prerequisites — Quick Checklist
Before implementation, confirm:
- WooCommerce admin access.
- Ability to edit theme files or use a child theme (see the WordPress child themes guide).
- A staging/test environment to validate changes.
- SKU / Product ID list and mapping plan for tryitonme links.
- tryitonme.com account and access to generated URLs.
How to Generate Try‑On Links in tryitonme.com (Step‑by‑Step)
- Log in to your tryitonme.com dashboard.
- Create a new product/link and select “Watches” as the product type.
- Upload your product photos (front/side) or select from your assets.
- Enter SKU or Product ID so the link maps to your WooCommerce variant.
- Repeat per variant (color, size) to generate a unique URL per SKU.
- Copy the generated URL (e.g., https://tryitonme.com/your-watch-link) and store it in your SKU mapping sheet.
Typical turnaround is under 3 business days after submission.
Embed Options Overview — Pros & Cons
You can embed VTO links several ways. Below are the common options and recommended use cases.
- Inline iframe on PDP
- Pros: Seamless, immediate visualization embedded in the page.
- Cons: Can impact page load; may clutter the product area.
- Use when: You have a minimalist PDP and can lazy‑load the iframe.
- Modal / Lightbox (recommended for PDP)
- Pros: Keeps PDP clean, preserves user flow, and loads the VTO only on demand.
- Cons: Requires a small JS snippet and attention to accessibility.
- Use when: You want best UX without affecting initial load.
- Direct link (new tab)
- Pros: Easiest to implement; perfect for social ads and support messages.
- Cons: Moves user off your site and can interrupt session flow.
- Use when: Social, chat, or ad placements.
- Shortcode / Gutenberg Block
- Pros: Easy for non‑developers to place anywhere in product content.
- Cons: Styling and dynamic mapping may require developer help.
- Use when: Site editors frequently update product descriptions or use page builders.
For guidance on iframe lazy loading and performance see MDN: iframe loading attribute. For modal accessibility patterns see WAI‑ARIA: ARIA dialog practices. For mobile performance tuning of link‑based VTO and Core Web Vitals guidance see: mobile performance guidance.
Inline iframe (when to use)
If you choose inline iframes, lazy‑load or defer the iframe until the user interacts or when scroll reaches it (use Intersection Observer; see MDN Intersection Observer).
Modal / Lightbox (recommended for PDP)
Modal is the recommended default for PDPs: place a clear PDP try on button near the Add to Cart, then open the tryitonme link in an iframe inside an accessible modal. Follow ARIA dialog patterns: ARIA dialog.
Direct link (social / support)
Use direct links in social posts or support chats. They’re ideal for campaigns or when you want the quickest path to try‑on without editing your site. Keep in mind you’ll navigate customers away from your product page.
Step‑by‑Step: Add a PDP Try On Button (code‑first)
Below are practical snippets to add a PDP try on button. Always test in a staging environment and use a child theme.
HTML button example for product template
<button class="tryitonme-btn" data-try-url="https://tryitonme.com/your-watch-link">Try On</button>WooCommerce hook snippet (functions.php) — example
Add this in a child theme’s functions.php (adapt your SKU→link mapping logic as needed):
<?php
add_action('woocommerce_after_add_to_cart_button', 'insert_tryitonme_button');
function insert_tryitonme_button() {
    global $product;
    $sku = $product->get_sku();
    $link = 'https://tryitonme.com/watch-' . $sku; // adapt logic to your SKU→link mapping
    echo '<button class="tryitonme-btn" data-try-url="' . esc_url($link) . '" aria-label="Try on this watch">Try On</button>';
}
?>
Security note: use esc_url() and validate mapping logic — do not expose raw inputs.
Dependency‑free modal JS snippet
This simple script creates a modal with an iframe. Add it to your theme JS or an HTML block. (Note: avoid forcing colors; let your theme handle visuals.)
document.addEventListener('click', function(e){
  if(e.target && e.target.classList.contains('tryitonme-btn')) {
    const url = e.target.getAttribute('data-try-url');
    const modal = document.createElement('div');
    modal.className = 'tryitonme-modal';
    Object.assign(modal.style, {position:'fixed',top:0,left:0,width:'100%',height:'100%',zIndex:9999});
    const iframe = document.createElement('iframe');
    iframe.src = url;
    Object.assign(iframe.style, {width:'100%',height:'100%',border:'none'});
    const closeBtn = document.createElement('button');
    closeBtn.innerText = 'Close';
    Object.assign(closeBtn.style, {position:'absolute',top:'10px',right:'10px',padding:'8px'});
    closeBtn.onclick = () => modal.remove();
    modal.appendChild(iframe);
    modal.appendChild(closeBtn);
    document.body.appendChild(modal);

    // Accessibility: move focus to modal close button
    closeBtn.focus();
  }
});
CSP note: If you have a strict Content Security Policy, whitelist tryitonme.com (see MDN CSP guide: MDN CSP).
Theme Edits & Implementation Tips
- Use a child theme: WordPress child themes guide.
- Common edit points:
content-single-product.php,single-product.php, or hook locations likewoocommerce_after_add_to_cart_button(see WooCommerce hooks). - Page builders: with Elementor or WPBakery add an HTML widget and paste button + JS.
- Popular themes: Storefront typically works with the hook above. For Astra or Flatsome, check their docs: Astra docs, Flatsome docs.
- Styling: match button visuals to your PDP; use a unique class (e.g.,
.tryitonme-btn) and let theme CSS control colors and font sizes.
Shortcode / Gutenberg Block Approach (no‑code option)
Shortcode for non‑developers (place in functions.php):
<?php
function tryitonme_button_shortcode($atts) {
  $a = shortcode_atts(array('url' => ''), $atts);
  return '<button class="tryitonme-btn" data-try-url="' . esc_url($a['url']) . '" aria-label="Try on this watch">Try On</button>';
}
add_shortcode('tryitonme_button', 'tryitonme_button_shortcode');
?>
Usage: add [tryitonme_button url="https://tryitonme.com/watch-link"] in product descriptions or a custom tab. Editors can use the Shortcode block or Elementor HTML widget.
Accessibility & UX Considerations
Checklist:
- Add
aria-labelto the try button (e.g.,aria-label="Try on this watch"). - Ensure modal traps focus and returns focus to the button on close (follow ARIA dialog patterns: WAI‑ARIA dialog).
- Provide keyboard support (Enter to open, Esc to close).
- Offer an image fallback (screenshot) with alt text if JS fails.
- Test responsiveness and low‑bandwidth behavior on mobile.
QA Checklist (Comprehensive)
Copy this checklist for QA:
- Button appears in the correct PDP location on desktop, tablet, mobile.
- Button opens modal/iframe and displays the correct tryitonme link for each SKU/variant.
- Variant changes (color/size) update the
data-try-urlwhere applicable. - Modal is keyboard accessible and traps focus.
- No JavaScript errors in console (open DevTools).
- Check cross‑browser: Chrome, Safari, Firefox, Edge.
- Test iOS and Android native browsers.
- Confirm lazy loading prevents iframe from loading on initial page load.
- Confirm CSP allows tryitonme domains.
- Validate analytics events fire (see Analytics section).
- Confirm cache/CDN rules don’t serve old mapping logic.
Analytics & Tracking — What to Capture and How
Event names to push to dataLayer:
try_on_open— when user opens the modal.try_on_complete— when session ends / user confirms or shares.try_on_share— when a share / snapshot occurs.
Sample event push (on click):
document.addEventListener('click', function(e){
  if(e.target && e.target.classList.contains('tryitonme-btn')) {
    window.dataLayer = window.dataLayer || [];
    window.dataLayer.push({
      event: 'try_on_open',
      product_sku: e.target.getAttribute('data-try-url').split('/').pop()
    });
  }
});
GTM and dataLayer best practices: see the Google Tag Manager guide and dataLayer best practices. KPI recommendations: try‑on engagement rate (opens / PDP views), add‑to‑cart rate after try‑on, and checkout conversion rate for users who used try‑on.
A/B Testing Ideas (to prove lift)
Quick experiments:
- Button copy: “Try On” vs “See on My Wrist”.
- Placement: below Add to Cart vs inside gallery.
- Embed type: modal vs inline iframe.
Measure: try‑on CTR, add‑to‑cart rate, and conversion rate.
Troubleshooting Common Issues
Common fixes:
- Button not showing: verify hook name and that theme doesn’t override product templates; check caching and CDN.
- Modal blocked: add tryitonme.com to CSP
frame-ancestorsandframe-src(see MDN CSP: MDN CSP). - Variant mismatch: confirm SKU→link mapping logic and product SKUs match.
- Styling conflicts: target a unique class (
.tryitonme-btn) and add CSS specificity to override theme styles.
Browser debugging resources: MDN debugging.
Example Walkthrough: Watches Try On WooCommerce
Example steps for “Classic Silver Watch”:
- Generate tryitonme link in the dashboard.
- Add the WooCommerce hook snippet to your child theme to output button after Add to Cart.
- Add the modal JS and minimal CSS to your theme.
- On staging, click the button, verify modal opens and displays the correct watch asset.
- Fire the
try_on_opendataLayer event and verify via GTM preview.
Suggested assets: dashboard screenshot (filename: tryitonme-dashboard-classic-silver.png, alt: “tryitonme dashboard – Classic Silver Watch”), try‑on GIF (classic-silver-tryon.gif, alt: “GIF showing Classic Silver Watch try-on flow”). See the tryitonme dashboard and demo at tryitonme.com.
SEO & Copy Suggestions (where to place keywords)
Quick guidance:
- H1: use watches try on woocommerce (as in this article).
- First paragraph: repeat watches try on woocommerce naturally.
- Benefits H2: use virtual try on woocommerce.
- Embed options H2: use embed try on woocommerce.
- Button section: include pdp try on button phrase.
Meta description suggestion: “Learn how to embed virtual try‑on for watches in WooCommerce. Step‑by‑step guide to adding a PDP try on button, theme edits, and QA.” Slug suggestion: /watches-try-on-woocommerce-guide.
Assets & Estimated Word Count
Target length: 1,300–1,800 words. Required assets:
- tryitonme dashboard screenshot(s) — filename: tryitonme-dashboard.png; alt: “tryitonme dashboard showing generated watch link”.
- code snippets (included in this article).
- GIF of try‑on flow — filename: tryon-demo.gif; alt: “User trying on a watch using tryitonme”.
- dataLayer screenshot — filename: dataLayer-tryon.png; alt: “dataLayer showing try_on_open event”.
FAQ
- Q: Will this slow my site?
- A: Not if you lazy‑load the iframe or use a modal that loads the tryitonme URL only on click.
- Q: How do I support multiple SKUs?
- A: Generate one tryitonme link per SKU/variant and map them in your
functions.phpor in your shortcode logic. - Q: Can I use it on product listing pages?
- A: Yes — but the PDP try on button is most effective for a focused, full‑detail try‑on experience. Listing pages work best with direct links.
- Q: I can’t edit code — what then?
- A: Use the shortcode/Gutenberg block approach and/or ask your page builder team to insert the provided HTML + JS.
- Q: Is tryitonme secure and compatible with CSP?
- A: You should whitelist tryitonme domains in your CSP (
frame-src/frame-ancestors) and validate data inputs. See MDN CSP guidance for details: MDN CSP.
Why tryitonme.com is the Right Fit for Your Business
- Accurate accessory VTO tailored to watches and other accessories.
- Speed: link generation and delivery typically under 3 business days.
- Easy integration: zero‑code, link‑based deployment across web, mobile, and social.
- Scalable workflow: per‑SKU links for variant accuracy and simple mapping.
Conclusion & Call to Action
Adding watches try on woocommerce functionality converts your PDP into an interactive showroom, reduces purchase hesitation, and improves customer confidence. With a link‑based VTO provider like tryitonme.com you avoid SDKs and long dev cycles — generate your links, map SKUs, add a PDP try on button, and be live fast (links are usually ready in under 3 business days after you submit assets). Ready to get started? Generate your try‑on links or request a demo at tryitonme.com.
Code Snippets & Templates (Appendix)
Files/snippets below — test on staging and adapt SKU→link logic to your setup.
- WooCommerce hook (functions.php) — see earlier in article.
- Shortcode (functions.php) — see earlier.
- Modal JS — see earlier.
- CSS button style (add to theme stylesheet):
.tryitonme-btn { padding:10px 18px; border-radius:4px; border:none; cursor:pointer; }
.tryitonme-modal { /* optional custom styling if used */ }
5) dataLayer sample push — see Analytics section.
Test on staging and ensure compatibility with your theme and caching strategy.
Pre‑publish checklist for author/editor/dev/QA
- Writer: confirm headings and keyword placements.
- Developer: implement code on staging; validate SKU→link mapping and CSP settings.
- QA: complete the QA checklist across browsers/devices and confirm analytics events in GTM Preview (see GTM event testing guide).
- SEO/Editor: confirm meta description, slug, and internal linking.
- Publish: move to production during low traffic window; monitor performance and analytics for the first 2 weeks.
If you’d like, we can provide the implementation checklist as a downloadable asset and a sample staging checklist tailored to your theme. Book a demo with tryitonme.com to see the dashboard and get your first watch link generated.