2D vs 3D Try On Hoop Earrings — Which Should Your Store Use?
Quick Summary
- Thin, front-facing hoops and huggies: 2D try on is fast, cheap, and scales well (Mirrar).
- Chunky, textured, or high-polish hoops: 3D gives better depth, reflections, and side views (Snap).
- Large catalogs: start with 2D for breadth, upgrade winners to 3D as budget allows (see TouchTry and Reeds).
- No-engineering pilot: try a link-based VTO provider like tryitonme.com to test both approaches quickly.
Introduction — what merchants and merchandisers are asking
You searched “2d vs 3d try on hoop earrings” because you need a fast, practical answer: should you roll a lightweight image overlay across hundreds of SKUs, or invest in 3D models for a smaller set of high-value pieces? The core tradeoff is simple — speed and cost versus realism and fidelity — and the right choice depends on the hoop’s shape, finish, and your catalog strategy. For a quick way to test both approaches without engineering work, consider a no-code, link-based VTO solution: upload standard product photos, your vendor’s team/AI handles AR processing, and you receive a shareable try-on link to deploy in under 3 business days (tryitonme.com). This article helps you decide, test, and scale the best option for your assortment.
TL;DR — quick verdicts for common scenarios
- Thin, front-facing hoops, huggies, and simple circles → 2D try on (fast and cost-effective). See Mirrar for examples.
- Chunky, textured, asymmetric, or high-polish hoops where side profile matters → 3D try on (better depth and material fidelity). See Snap’s ear-binding workflow.
- Large catalogs or social previews → start with 2D to cover breadth quickly (see TouchTry and Reeds).
- Unsure? Launch 2D broadly, measure top performers, then upgrade winners to 3D.
How 2D try on works (accessible technical overview)
2d try on — Core mechanics (ear/face keypoints, compositing)
A 2D try-on uses product photos or rendered flat images that are composited over the shopper’s live image or selfie. The system detects facial/ear keypoints and anchors the image, scaling and rotating to match head position. For background on how earring overlays are anchored, see Mirrar and an overview from PRMAL.
In practice, a front-facing product shot is aligned with the detected ear region and adjusted frame-by-frame so the hoop appears attached as the user moves.
2d try on — Strengths (speed, cost, asset size)
- Fast to produce and deploy: 2D assets are images so they compress well and load quickly on mobile (PRMAL).
- Lower production cost and easier bulk coverage: photography + simple image prep scale across many SKUs (Reeds).
- Works well for social previews, stories, and quick PDP augmentation (TouchTry).
2d try on — Limitations (angle, lighting, occlusion)
How 3D try on works (accessible technical overview)
3d try on — Core mechanics (CAD/photogrammetry, real-time rendering, PBR lighting)
A 3D try-on binds a modeled earring to the ear and renders it in real time with head tracking and scene lighting. Models come from CAD, photogrammetry, or art pipelines; textures are often PBR so metal specular and reflections look realistic. See Snap’s real-time rendering notes.
For dangling hoops, 3D systems can add simple physics so movement looks natural as the user turns their head.
3d try on — Strengths (depth, material fidelity, multi-angle)
- Better depth, rotation, and accurate representation of thickness and reflective properties.
- Supports multi-angle inspection and more natural occlusion handling, increasing shopper confidence on PDPs and AR campaigns.
3d try on — Limitations (cost, time, asset weight)
- Higher production cost and longer setup time: modeling, retopology, texture baking, and optimizations are required.
- Heavier runtime assets increase mobile GPU demand; plan for LODs and compression (Snap).
Head-to-head: 2D vs 3D for hoop earrings (detailed comparison)
Realism & material fidelity (3d try on)
3D wins on accurate reflections, specular highlights, and thickness cues because it models geometry and lighting rather than faking them in 2D. See Snap.
Viewpoint coverage & rotation (2d try on)
2D works best near front-facing views and for small rotations; 3D is better when shoppers need to examine side profiles or multiple angles. See discussion at PRMAL and Reeds.
Fit & perceived sizing
Diameter is usually communicated well by 2D overlays; thickness and interior depth are more believable in 3D (Snap).
Occlusion & hair interactions
Earrings are often partially hidden by hair — 3D systems can manage layering more naturally, but both approaches benefit from UX prompts. See Mirrar and Snap.
Motion, latency & mobile performance
2D is lighter and loads faster; 3D requires LOD strategies, compression, and lazy-loading to avoid latency spikes (Snap).
Implementation time, cost & catalog scaling
2D supports broad, fast rollouts for large catalogs (Reeds, PRMAL, TouchTry). Reserve 3D for curated, high-margin SKUs.
Hoop-specific considerations (why earrings differ from other accessories)
Ear anchor accuracy & small-motion amplification
Earrings attach to a small, mobile part of the head — tiny tracking errors become very visible. Providers like Mirrar and Snap emphasize precise ear anchoring.
Hair occlusion and user prompts
Add UX prompts such as “Brush hair back,” “Tilt head slightly,” or a tap-to-adjust control to materially improve perceived accuracy.
Hoop geometry & material concerns
- Thin hoops and huggies → 2D recommended.
- Thick, sculptural, or high-polish hoops → 3D recommended.
- Dangling elements or chain attachments → 3D if motion realism matters (Snap).
Decision framework — when to choose 2D vs 3D
Which is better 2d 3d try on? Quick checklist
- Fast MVP, low budget, or broad catalog → 2D (Mirrar, TouchTry, Reeds).
- High-margin SKUs, complex geometry, or materials where reflections matter → 3D (Snap).
- Unsure? Start 2D, test, then upgrade winners to 3D.
Simple decision tree (visual suggestion)
Ask your designer to create a one-column decision tree: Catalog size → Product complexity (thin/simple vs thick/complex) → Budget/time → Recommended tech (2D or 3D). Use linked sources as captions.
Production workflows — step-by-step for each option
2D workflow (photography tips, anchor prep, asset export)
- Photograph clean, front-on product shots (and one three-quarter if available). See Reeds and PRMAL.
- Remove background and export PNGs with transparent backgrounds.
- Define anchor points (top/bottom of hoop relative to post) and provide scale reference (mm diameter).
- Deliver assets and SKU mapping to your VTO vendor.
3D workflow (capture → retopology → PBR → LOD)
- Capture (photogrammetry or CAD-based modeling).
- Retopology and UV unwrapping.
- Texture baking and PBR material setup.
- Create LODs and export web-friendly formats (glTF recommended). See Snap.
If you’re shortlisting vendors and need a procurement brief, use a hoop-specific RFP pack: hoop-specific RFP.
Timelines & scaling guidance
2D: often days → a couple of weeks for broad cataloging (see pricing notes). 3D: typically multi-week per SKU depending on complexity; plan batching and prioritization (Snap).
Implementation & deployment with tryitonme.com
- Choose a package (6-month licensing based on SKU count). Pricing.
- Send standard product photos (front/side where available).
- tryitonme’s team/AI handles AR processing (image compositing for 2D or integrating provided 3D assets).
- You receive a unique, ready-to-use try-on link for each product — deploy across web, mobile, social — typically in under 3 business days (tryitonme.com).
Practical rollout playbook
- Launch 2D links across your catalog via tryitonme links.
- Measure KPIs by SKU and channel.
- Replace top-performing SKUs with 3D links as you commission models.
- Compare lift and iterate.
Performance & UX best practices
3d try on — Mobile performance (LOD, compression, lazy-load)
Use LODs and compressed textures to reduce load; lazy-load 3D assets and only instantiate the model when a user taps “Try On.” See Snap performance guidance.
Interaction & onboarding (hair prompts, tap-to-adjust)
Copy examples: “Tap to try on”, “Brush hair back for best results”, “Tilt your head slightly for a side view”. Friction-free entry points and clear guidance improve adoption (Reeds, PRMAL).
Accessibility & fallback strategies
Provide GIF previews, static lifestyle photos, or a short video demo when AR is unsupported or slow.
Measurement — KPIs to determine which is better
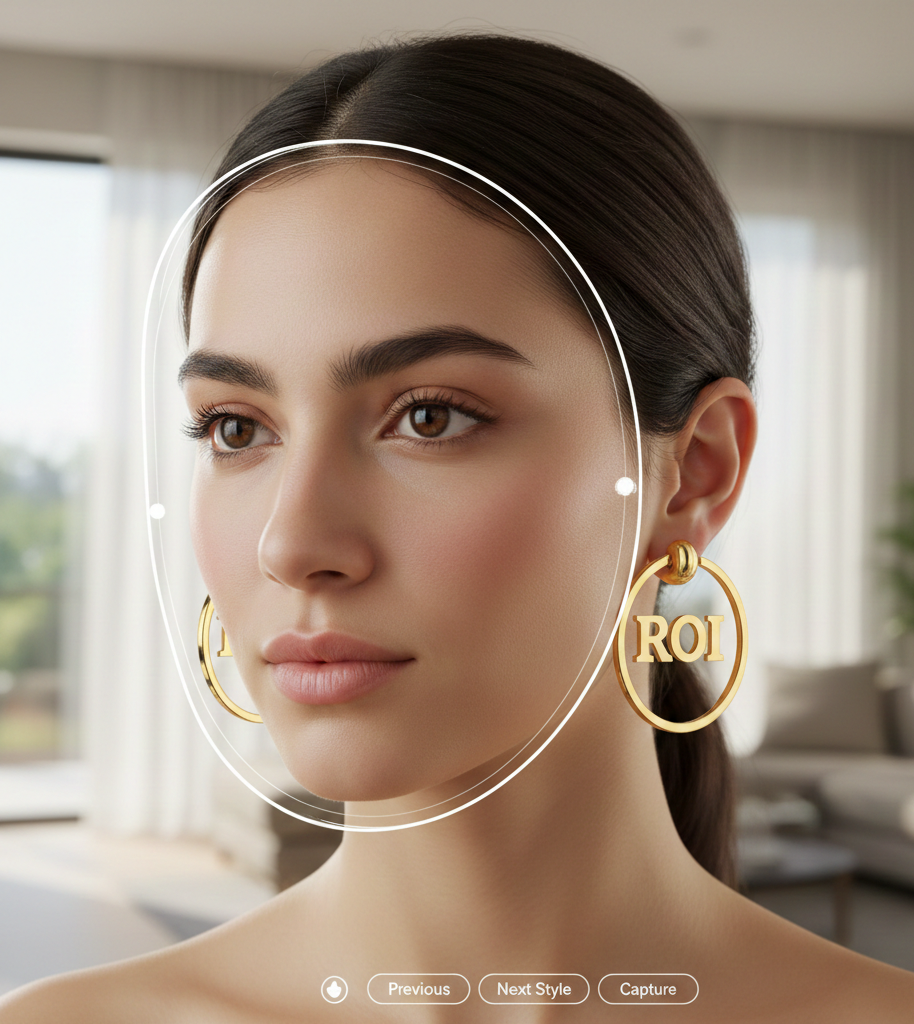
Track conversion rate, add-to-cart rate, time on PDP, share rate, and post-purchase return rate. PRMAL and Mirrar discuss measuring VTO impact. For hoop-specific ROI playbooks and expected uplifts, see hoop earrings ROI analysis.
A/B test ideas
- Same SKU: 2D vs 3D on identical traffic.
- Channel split: 2D in social stories vs 3D on PDP.
- SKU split: thin vs chunky hoops with respective tech.
Hybrid & progressive strategies (practical scaling playbook)
Serve 2D to low-end devices and 3D to capable devices. Detect device capability (CPU/GPU or user-agent) and implement progressive enhancement to balance reach and fidelity.
Catalog prioritization rules
Prioritize 3D for high-margin items, SKUs with high PDP views, and top cart-converters.
Using placeholders while 3D assets are built
Upload a 2D link now and swap the try-on link to 3D when available — no dev required with a link-based platform.
Common pitfalls & troubleshooting
- Anchor errors → provide precise anchor point notes and a reference photo.
- Hair occlusion → add a “move hair” prompt and offer tap-to-adjust.
- Lighting mismatch → supply additional photos under neutral lighting or request 3D PBR setup.
- Heavy 3D assets → request LODs and compression.
- Latency on mobile → lazy-load and defer 3D until user intent.
- Incorrect scale → include millimeter diameter/weight in asset metadata.
Visuals & assets to include (instructions for designer/editor)
Request these visuals for the post:
- Side-by-side GIFs: identical hoop rendered as 2D overlay vs 3D model (desktop + mobile). Reference: TouchTry demos.
- Decision-tree graphic: “Which is better 2d 3d try on?”.
- Before/after conversion lift chart (illustrative; label as hypothetical).
- Asset thumbnails: example front-on photo, three-quarter photo, sample glTF preview.
Practical examples / mini case studies
Final recommendation & merchant checklist
Short plan:
- Launch 2D across your catalog via tryitonme links.
- Measure conversions and engagement for each SKU.
- Upgrade top performers or high-margin SKUs to 3D and compare lift.
Merchant checklist
- Start 2D for simple, high-volume SKUs.
- Prioritize 3D for complex geometry or premium finishes.
- Use device detection to serve the right experience.
- Monitor conversion, add-to-cart, and returns to make evidence-based upgrades.
Why tryitonme.com is the Right Fit for Your Business
- Accurate VTO for accessories (eyewear, jewelry, watches, hats).
- Fast: no-code, link-based deployment with ready-to-share links in under 3 business days.
- Easy integration: deploy across web, mobile, and social without SDKs or dev cycles.
- Scalable test-and-learn: launch 2D broadly, then incrementally swap to 3D for winners.
Book a Demo at tryitonme.com.
Call to action
Ready to test 2D vs 3D quickly without engineering work? Request a live demo or create a trial try-on link at https://tryitonme.com. Typical onboarding: purchase a 6-month package, send standard photos, the tryitonme team/AI handles AR processing, and you receive a shareable try-on link in under 3 business days. Test both approaches in real traffic and decide with data — not guesswork.
FAQ
1) Which should I choose for a large catalog with limited budget?
Start with 2D to cover breadth quickly and cheaply, measure SKU performance, then upgrade top performers to 3D where the ROI justifies the cost (Reeds, PRMAL).
2) How much does 3D modeling typically cost and how long does it take?
Costs vary by complexity and vendor; expect multi-week timelines per SKU for high-fidelity models and retopology. Use batching and prioritize high-margin SKUs to improve economics (see Snap guidance).
3) Can I start with 2D and later switch to 3D without developer work?
Yes — link-based platforms let you swap try-on links for a SKU when the 3D asset is ready, typically without additional dev cycles (tryitonme.com).
4) How do I handle hair occlusion and small anchor errors?
Add clear UX prompts (e.g., “Brush hair back”), provide anchor-reference photos to your VTO vendor, and implement tap-to-adjust controls. 3D helps but UX cues are essential for both approaches (Mirrar).
5) What KPIs should I track to judge which approach is better?
Measure conversion rate, add-to-cart rate, time on PDP, share rate, and post-purchase return rate. Run A/B tests: same SKU 2D vs 3D and channel splits for cleaner insights (hoop ROI guide).
References
- Mirrar virtual earring try-on
- Snap ear-binding & try-on developer docs
- PRMAL virtual try-on overview
- Reeds virtual try-on workflow
- TouchTry virtual earring try-on
- tryitonme home / demo
- Hoop earrings virtual try on pricing
- Hoop earrings try on vendor checklist
- Hoop earrings virtual try on RFP
- ROI hoop earrings virtual try on