Blue Light Glasses Try On Mistakes: How to Avoid UX, Photo and Calibration Pitfalls
Blue light glasses try on mistakes are common pain points for ecommerce teams selling eyewear. If your virtual try-on (VTO) previews look off, misrepresent lens tint, or fail on certain phones, you’re likely losing conversions and generating unnecessary support tickets. This guide gives your product, UX and support teams a practical troubleshooting playbook — from onboarding microcopy to calibration checks — and shows how a zero-code, link-based VTO like tryitonme can cut implementation time and reduce these errors.
Ringkasan Cepat
- Perbaiki UX onboarding, gunakan overlay panduan, dan sediakan fallback foto untuk perangkat rendah.
- Standarisasi foto produk dan gunakan landmark-based scaling (PD-aware) untuk akurasi fit.
- Publikasikan batasan browser/OS dan jalankan QA lintas perangkat untuk mengurangi dukungan.
Why VTO Matters for Eyewear and Blue Light Glasses
Virtual try-on technology helps shoppers visualize frames on their own faces, increasing confidence and reducing uncertainty before purchase. For blue light glasses, realism matters not only for fit but for subtle lens tint and reflections that influence buying decisions. Addressing common VTO mistakes improves purchase likelihood and lowers customer service load.
We recommend you prioritize a user-friendly VTO that’s quick to deploy. Platforms like tryitonme.com provide a no-code, link-based option so you can launch try-on experiences without SDKs or heavy engineering work: buy a package, provide standard product photos, and receive a shareable try-on link in under 3 business days.
Common virtual try on mistakes for eyewear
Recognize these frequent failure modes so you can spot them in analytics and QA.
- Incorrect frame scale or size — glasses appear too large or small relative to facial landmarks.
- Blue-light example: subtle tint looks off when lens scale is wrong.
- Color and tint misrepresentation — reflection, filter, or overlay errors that mute or overplay blue tint.
- Low-quality camera or sample photos — compression, blur, or wrong perspective warps the model.
- Face-detection and alignment failures — landmark loss, occlusion or extreme angles misplace frames (see MediaPipe face mesh and frame-fit guidance).
- UI friction and confusing controls — too many sliders or unclear modes cause user abandonment.
- Device support gaps — browser and OS differences cause inconsistent behavior or blocked camera access.
- Poor lighting and background clutter — shadows, backlight and busy scenes break detection and reduce realism.
- Slow load times — long waits or blocking modals reduce engagement.
UX pitfalls that cause blue light glasses try on mistakes
Blue light glasses try on mistakes often originate in UX design. Fix these to reduce errors and support load.
- Onboarding & permissions: Poorly worded camera permission prompts confuse users. Use simple microcopy that explains why access is needed.
Example microcopy: “We need camera access to show frames on your face. Tap Allow to try on glasses in real time.”
Technical guidance: follow MDN best practices for Permissions and getUserMedia.
- Mode clarity (live vs. photo): Explicitly label modes and show a quick tip for each. “Live preview” vs “Upload a photo” reduces mode errors.
- Control complexity: Avoid exposing too many manual sliders. Offer a one-tap auto-fit plus a single “fine-tune” control.
- Loading states and fallbacks: Show skeleton UIs and immediate feedback; provide upload fallback when live camera fails.
- Accessibility & privacy: Add text alternatives for visually impaired users and a clear privacy note about camera use and image handling; reference W3C WAI guidance.
Quick A/B test idea
- A/B test: “Auto-fit + one fine-tune” vs “full manual controls.” Measure completion rate and time-to-try-on.
Photo and camera quality pitfalls
Many failures come down to the input. Differentiate between supplier sample photos and user camera feeds.
Common issues
- Supplier photos at different focal lengths than user cameras cause scale drift.
- Reflections and hotspots obscure lens tint.
- Busy backgrounds interfere with landmark detection.
Three practical fixes
- Standardize product photos — require front and side shots with neutral background and specified focal range.
- Add an “ideal photo” overlay on upload — guide composition and head position with clear microcopy: “Place face inside oval; remove hats & sunglasses; front view in natural light.”
- Provide a live-camera fallback — when uploads are poor, prompt users to use the camera for a more accurate preview.
Technical resource: use landmark guidance like MediaPipe’s face mesh to align overlays and scale.
Calibration errors and how to fix them
Calibration is where fit realism breaks down. Common calibration failures include poor landmark detection, incorrect interpupillary distance (PD) scaling, and focal-length mismatches.
Why PD matters
Interpupillary distance affects horizontal placement and perceived fit. For general background, see PD basics: Interpupillary distance and practical PD/fit guidance: PD try-on guide and frame-fit guide.
Checklist to fix calibration
- Use robust face landmarks (refer to MediaPipe face mesh).
- Implement landmark-based scaling rather than purely bounding-box scaling.
- Offer both auto-estimate and manual PD input — let users enter PD if they know it.
- Provide live visual calibration feedback: show pupils, a horizontal alignment guide, and immediate update when the user adjusts PD.
- Run frame-to-face offset tests across camera focal lengths and apply a focal-length compensation factor.
Engineering QA items
- Verify landmark stability at ±15° head rotation.
- Confirm PD-based scaling holds at common camera distances (arm’s length, selfie distance).
- Check overlay occlusion handling for eyewear with large frames.
Device and browser support pitfalls
Device support varies; plan for it.
Key differences
Mobile browsers (iOS Safari, Android Chrome) and desktop behave differently with camera APIs and permission flows. See WebRTC and getUserMedia guidance.
Low-end phones may lack GPU/CPU headroom for real-time AR. For mobile-specific performance optimizations and testing guidance, see mobile performance guide.
Recommendations
- Publish minimum supported browsers and OS versions on your product page.
- Implement graceful degradation: if live camera is too heavy, switch to photo upload or a low-fidelity preview.
- Test on a matrix that includes recent Chrome and Safari versions, latest two iOS/Android major releases, and representative low-end Android devices.
Try on troubleshooting: step-by-step checklist
Use this checklist for frontline support that reduces back-and-forth.
- Confirm OS & browser compatibility (ask for browser name and version).
- Verify camera permissions: guide users to browser permissions and OS privacy settings.
- Check lighting & background: ask user to move to natural, frontal light and remove obstructions.
- Re-calibrate or retake photo using guided overlay.
- Clear cache / try incognito or another browser to rule out cached scripts.
- Collect device logs/screenshots and escalate if unresolved.
Support team SOP (canned responses & escalation)
Canned replies (copy-ready)
- “Thanks — can you confirm the browser & device? If you’re on mobile, try Chrome (Android) or Safari (iOS).”
- “If the frames look off, please retake the photo using this overlay: ‘Place face inside oval; remove hats & sunglasses; front view in natural light.’”
- “If camera access is blocked, open Settings → Privacy → Camera and enable access for your browser, then reload the page.”
Escalation steps
- Ask for a screenshot and a short screen recording.
- Capture browser console logs and user agent string.
- Tag engineering with device model, OS version, and steps already tried.
Get a free try-on link — Request a demo and receive a ready-to-use product link delivered in under 3 business days. Request a demo
Testing and QA checklist (devices, lighting scenarios, sample photos)
Make QA efficient with a prioritized test matrix and scenarios.
Device matrix (priorities)
- Desktop: Chrome, Edge
- Mobile: iOS Safari (latest 2 major), Android Chrome (latest 2 major)
- Representative low-end Android device
Test scenarios
- Bright indoor light, low light, strong backlight.
- User wearing other eyewear or hair obstructing the face.
- Photo upload of static images vs live camera.
- Rapid head rotation and slight tilt.
KPIs for QA
- Try-on engagement rate (sessions that start a try-on)
- Time-per-session (how long users spend in try-on)
- Mismatch / report rate (user complaints about fit or tint)
- Support ticket volume related to try-on
Analytics, measurement and KPIs to watch
Instrument events to spot regressions and common virtual try on mistakes. See analytics guidance: try-on analytics and ROI & measurement.
Suggested events
- tryon_opened, tryon_mode (live/photo), calibration_completed, pd_entered, tryon_shared, tryon_purchased
Metrics to monitor
- Engagement (tryons per 1,000 PDP views)
- Conversion lift for sessions with try-on vs without
- Time to first calibration
- Support tickets per try-on session
A/B test suggestions
- Guided overlay vs no overlay
- Live camera vs photo upload
- Default auto-scale vs user-adjustable scale
Visuals and assets to include in the blog
Provide these assets for clarity and accessibility.
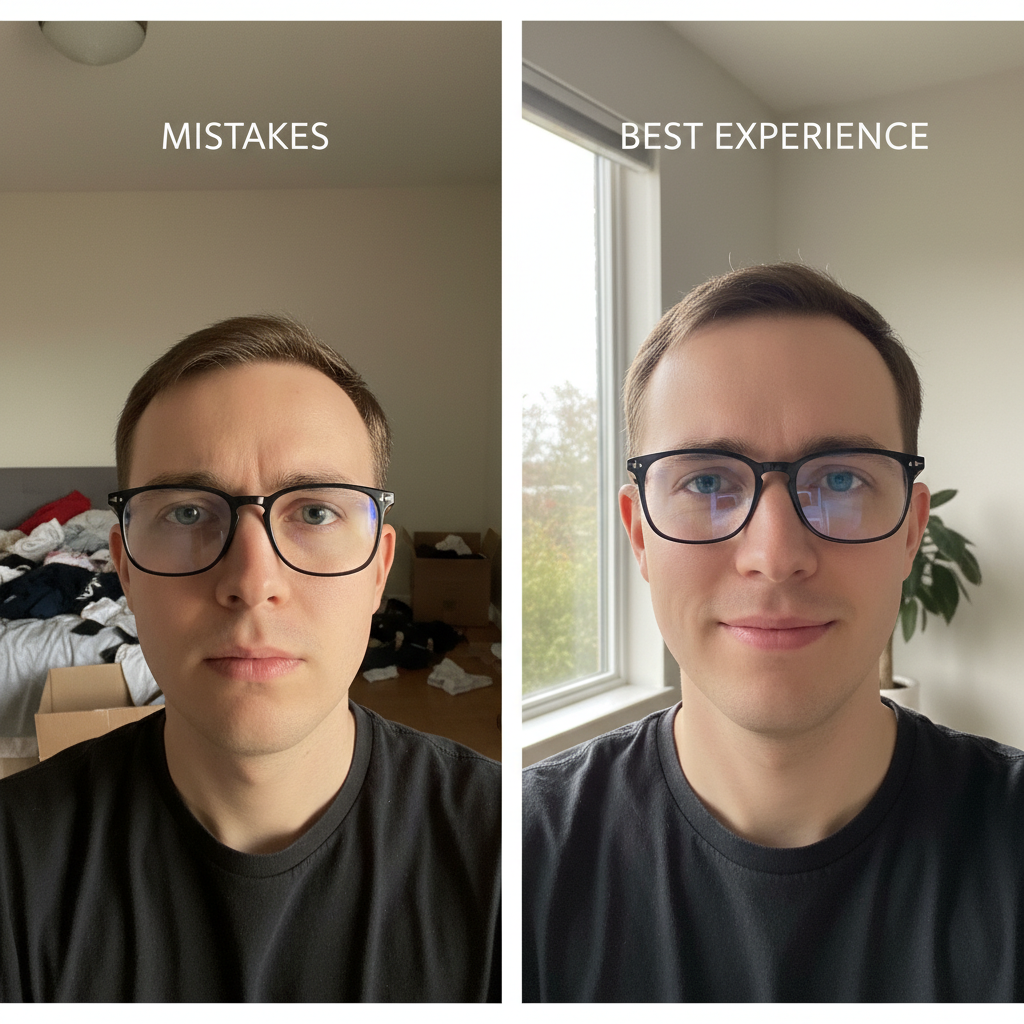
- Before/after images (mis-scaled vs corrected).
- Screenshots: guided overlay, calibration UI, shareable tryitonme.com link flow.
- Flowchart: troubleshooting steps.
- QA matrix table (device x scenario).
Alt-text and caption suggestions
- “Before: eyeglasses rendered too wide across face.” (alt)
- “After: properly calibrated frame aligning to pupil centers.” (alt)
- Captions should note the fix applied (e.g., “Added PD-based scaling and overlay guidance”).
Why tryitonme.com is the Right Fit for Your Business
- Zero-code, link-based deployment — no SDK or API work needed.
- Fast onboarding: buy a 6‑month package → send standard product photos → tryitonme.com team/AI handles AR processing → receive a unique try-on link in under 3 business days.
- Built-in calibration and guided overlays to reduce fit and tint errors.
- Cross-device fallbacks (photo upload + low-fidelity preview) to maximize reach.
- Analytics and simple sharing for ecommerce pages and social channels.
Call to action: Book a Demo — Request a demo or get a free test link at https://tryitonme.com/demo
How tryitonme.com prevents these common mistakes (features & workflow)
- Photo & camera quality: Guided overlays and submission checks lower bad inputs.
- Calibration: Landmark-based scaling and PD handling reduce misalignment.
- Device support: Link-based delivery works across web, mobile and social without an SDK; photo upload fallback improves compatibility.
- UX: Streamlined permission flows and one-tap auto-fit reduce user error.
- Analytics: Events to detect uplift or regressions so you can iterate.
Getting started (simple workflow)
- Create a demo link in tryitonme.com.
- Embed the link on your product page or share on social.
- Collect engagement data and refine copy and imagery.
FAQs (short answers)
- Q: How should we handle low-end phones?
- A: Provide a photo-upload fallback and a low-fidelity preview. Recommend minimum supported browsers on the PDP.
- Q: Can VTO show blue light tint accurately?
- A: VTO can represent subtle tint if calibration and sample photos are standardized; use guided lighting and high-quality product images to improve accuracy.
- Q: What to do when face detection fails?
- A: Ask the user to remove obstructions, move to neutral lighting, and re-position head inside the overlay. If it persists, collect a screenshot and escalate.
- Q: How should customers measure PD?
- A: Offer an on-site PD estimator or allow manual PD entry; provide a short how-to with ruler or selfie-based guide linked to your PD guide.
- Q: How long does onboarding take?
- A: Tryitonme offers a typical turnaround of under 3 business days after receiving standard product photos.
Conclusion + CTA
Key takeaways
- Most blue light glasses try on mistakes come from UX friction, poor input photos, calibration errors and device support gaps.
- Fixes are practical: clearer onboarding, overlays, PD-aware calibration and graceful degradation.
- You can deploy a no-code, link-based VTO quickly to test improvements with real customers.
Primary CTAs:
- Request a free try-on link — test one product with zero code.
- Book a demo — get a ready-to-use link in under 3 business days.
Microcopy + Support Snippets (copy/paste)
Support replies (short, <30 words)
- “Please confirm browser & device. If mobile, try Chrome (Android) or Safari (iOS) and reload.”
- “Retake photo using the overlay: ‘Place face inside oval; remove hats & sunglasses; front view in natural light.’”
- “Camera blocked? Open Settings → Privacy → Camera and allow your browser, then reload the page.”
Product-page microcopy (short)
- Permission prompt: “Allow camera to try frames on your face — no images saved without your consent.”
- Overlay hint: “Center your face in the oval for best fit.”
- Conversion CTA: “Try on now — see how these blue light glasses look on you.”
Distribution & internal linking plan (brief)
On-site placements
- Product detail pages (PDPs): embed try-on link and microcopy.
- Support center: add FAQ and troubleshooting checklist.
- Developer docs: link to integration-free setup article.
Social and email
- Social angle: “Try these blue light glasses on — zero downloads.”
- Email subject lines: “See how these blue light glasses look on you” / “Try before you buy — instant virtual try-on link”
Internal links to include
- tryitonme.com/demo
- tryitonme.com/features
- Related content: “How to implement VTO without code”, “Eyewear photography best practices”
Final note: If your team wants to stop losing sales to bad previews, start with one product link and iterate. Request a demo or get a free try-on link to validate improvements fast: https://tryitonme.com/demo