Blue Light Glasses Try On Photo Requirements: The Ultimate Guide for High-Converting VTO
Quick Summary
- Take a lossless 2–4k px master (long side ≥2000 px) and export it to the web in sRGB JPEG 80–90%.
- Include a color/gray card reference frame for each session and save one masked PNG/TIFF per SKU.
- Use a 50–85 mm equivalent focal length, a large, diffused light, and a polarizer if necessary to reduce reflections.
- Model: head centered, hair tossed, neutral expression; provide straight-on + 3/4 + profile.
Introduction — Blue light glasses try on photo requirements
If you want reliable, realistic virtual try-on for blue light glasses, the first step is great imagery. This guide provides a practical, end-to-end checklist—capture specs, lighting, reflection handling, UGC guidance, and export rules—so your VTO looks and fits as intended. tryitonme.com delivers a ZERO‑CODE, LINK‑BASED VTO: you provide the standard product images, the tryitonme team/AI handles AR processing, and you get a ready-to-use shareable try-on link in under 3 business days. Read on for studio-ready steps and printable shot lists. For platform details see the tryitonme eyewear platform overview.
Who this guide is for
- Ecommerce managers and product owners selling blue light glasses
- Photographers and studios preparing product & model shots for VTO
- Marketing and growth teams deploying try-on links via tryitonme.com
- Customer support and QA teams verifying try-on assets
- Customers / UGC contributors submitting selfies for try-on
TL;DR — Quick checklist (product photo guidelines try on)
- Capture masters at 2–4k px; long side ≥ 2000 px.
- Master file formats: TIFF or PNG; web exports: sRGB JPEG (80–90%).
- Include a gray card/color checker reference in one frame per shoot (see X‑Rite ColorChecker).
- Angles: front, 45° L/R, profile, temple/top close-ups.
- Lighting: large, diffuse sources; avoid frontal specular highlights; consider polarizers (see polarizing filters primer).
- Use 50–85 mm (full‑frame equivalent) focal length to minimize distortion (see portrait focal length primer).
Why good photos matter for VTO
High-quality imagery is the backbone of accurate VTO. Clear, consistent product and model photos help the VTO engine detect edges, sample true colors, and position frames correctly on the face. That results in customers who get better expectations, fewer returns, and higher confidence at checkout. Ecommerce photography also affects conversion and perceived quality—see Shopify’s product photography guide. For more on how link-based VTO lifts conversions and reduces returns, see our ROI analysis.
Blue light glasses try on photo requirements (core)
Technical image specs
- Resolution: Capture masters at 2–4k px; long edge ≥ 2000 px to preserve detail for masking and inspection.
- Masters: Save high-quality TIFF or PNG for each view (lossless). Keep unflattened masters that retain metadata.
- Web exports: sRGB JPEG 80–90%; export sizes for product pages: 1200–2000 px wide. See format tradeoffs at Adobe’s PNG vs JPEG guide.
- Color: Use sRGB for final exports. Capture a color checker and gray card for white balance reference (X‑Rite ColorChecker).
- Filenames & metadata: Use SKU-based names and embed SKU/product name in IPTC/XMP fields.
Orientation & framing
- Framing target: head should fill ~60–75% of frame height with shoulders visible to help face-bounds and scale.
- Center & level: eyes on a level horizontal axis and head centered; use a tripod to eliminate tilt.
- Include a full-face straight-on as the primary alignment reference; supplement with 3/4 and profile captures.
Pose & expression
- Do: neutral expression, eyes open and looking at camera, lips relaxed, hair tucked behind ears where possible.
- Don’t: exaggerated expressions, tilted chins, hands touching frames—these complicate automated landmark detection.
Camera settings & focal length
- Use focal length equivalent to 50–85 mm (full‑frame) to avoid perspective distortion (see primer).
- Keep the face entirely in focus; use autofocus with face-detection or an aperture appropriate for DOF.
- Lock exposure for consistency; shoot in RAW for controlled corrections.
Background & environment
- Use a neutral, mid-gray or white background for product and model shots to avoid color casts and simplify mask generation (Shopify guide).
- Keep backgrounds consistent across SKUs to maintain catalog uniformity.
Product photo guidelines — Required product views
- Front-on, level (primary alignment).
- 45° left and right (three-quarter).
- Full profile (side) left & right.
- Top/temple shot showing temples and hinges.
- Close-up of bridge and nose pads.
- Close-up of lens surface and coating (to show AR/blue-light tint).
- One high-resolution front for color/coating verification.
- Transparent/isolated PNG or masked TIFF for product overlays (alpha channel when requested).
Remove background for mask-based workflows; supply a flattened PNG with alpha when requested.
Alignment & symmetry checks
Ensure front-on image has a level eyewire and symmetrical frame reflection. Small tilt or off-center alignment can cause frames to appear askew in VTO. For guidance on PD/IPD and fit, see our pupillary distance try-on guide.
blue light glasses reflections occlusion
Why reflections & occlusion matter
Specular highlights, AR coating glints, and overlapping objects (hair, hands, hats) confuse edge detection, color sampling, and occlusion masks. Minimizing these artifacts at capture results in cleaner masks and more realistic overlays.
Capture-side tactics to minimize reflections
- Use large, diffuse light sources: softboxes, light tents, or big window diffusers (softbox guide).
- Position lights at roughly 45° to the lens surface and slightly above eye level to avoid direct frontal glints.
- Use a polarizing filter on DSLRs/compacts to reduce glare (see polarizer basics).
- Advanced studios: consider cross-polarization to eliminate reflections entirely.
Composition tactics to avoid occlusion
- Tuck hair behind ears and remove hats/hoods during model shoots.
- Keep hands and props away from temples and lenses.
- Use a hair clip or minimal styling to ensure temples are visible.
Post-production best practices
- Do minimal spot correction to remove dust and sensor artifacts.
- Avoid altering frame geometry, edge thickness, or lens shape.
- Do not change lens tint or perceived coating beyond basic white balance correction—preserve true color for try-on.
VTO-side handling
Provide both product-only masked images and model references so the try-on engine can combine product geometry with face captures and apply occlusion masks correctly. Multiple angles and a high-res close-up of the lens surface improve blending accuracy. If you’re evaluating 2D vs 3D approaches, see our practical guide comparing them: 2D vs 3D try-on guide.
Color fidelity & exposure
- Capture a gray card and color checker per session for white balance (see X‑Rite).
- Set lights to consistent color temperature (~5500K) and note in metadata.
- Edit masters in a color-managed workflow; export finals in sRGB (sRGB vs Adobe RGB).
- Validate on calibrated monitors before upload.
Mobile & user-generated content guidance
Consumer selfie instructions (copy for emails/checkout)
- Stand near a window for soft, natural light; avoid backlight.
- Face the camera directly; eyes level to the lens.
- Tuck hair behind ears and remove hats.
- Keep a neutral expression; hold the phone at arm’s length.
- Upload a straight-on and one 15–30° 3/4 shot if possible.
On-screen guide elements
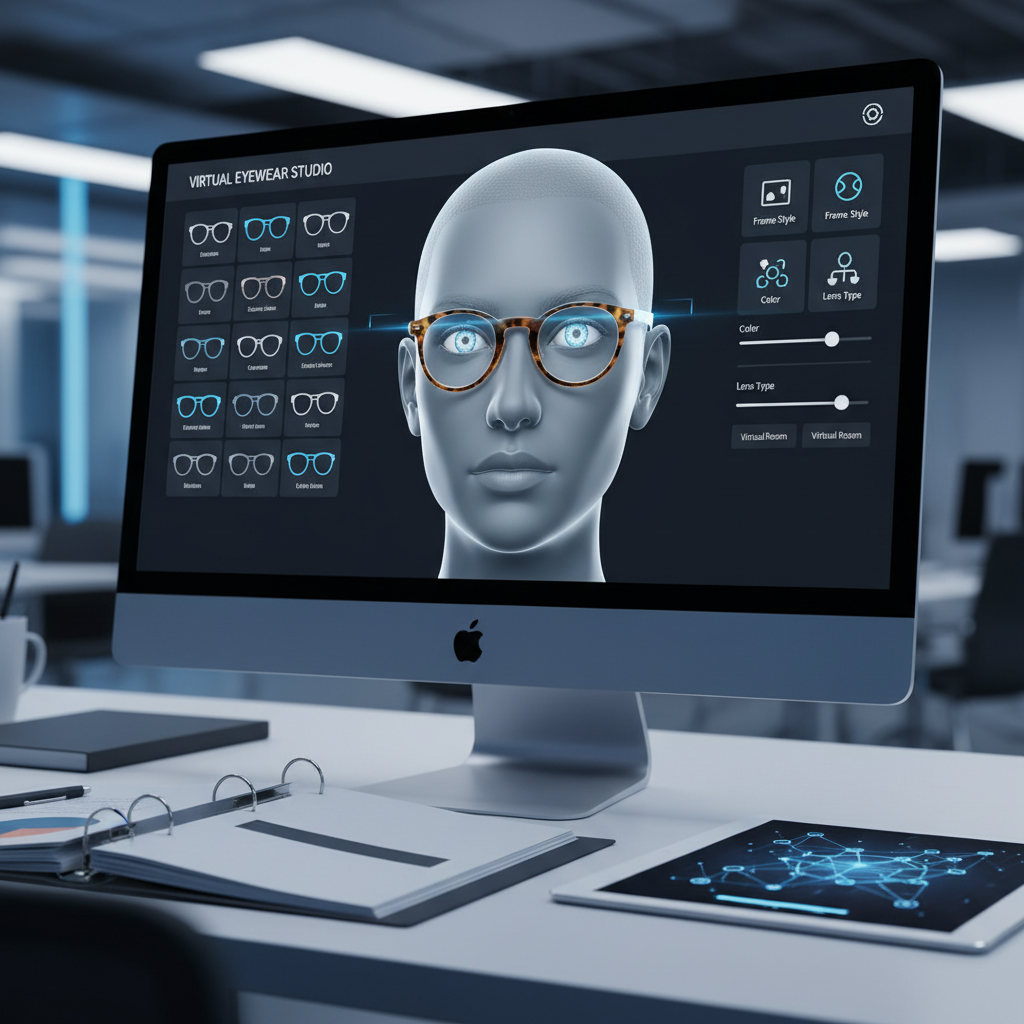
Include a face overlay, eye-line marker, and progress prompts in the capture flow to improve completion rates. tryitonme’s link-based flow can deploy a guided capture experience without SDK work—ask for a demo to see guided capture in action.
Post-production & export rules
- Save an untouched master (TIFF/PNG).
- Export web versions: JPEG sRGB 1200–2000 px wide, quality 80–90%.
- Keep one PNG/TIFF master with alpha for mask-based overlays.
- Filename examples: GLASSESCO_1234_front.tif, GLASSESCO_1234_45R.jpg, GLASSESCO_1234_mask.png.
- Embed SKU/variant info in metadata and maintain a CSV manifest mapping filenames to tryitonme product IDs.
QA & testing in tryitonme.com
- Upload product masters and masked PNGs to your asset batch (tryitonme).
- Request the sample try-on link from tryitonme.
- Open the shareable link on desktop and mobile—test iOS and Android. For mobile performance tips see mobile performance guide.
- Check alignment on multiple face shapes and head rotations (straight-on, 3/4, smile).
- Validate color fidelity against a real-swatch photo and check lens reflections.
- If issues: replace the frontal shot with a re-leveled image or re-shoot with diffusion/polarizer.
- Run A/B tests of imagery variants to measure engagement; see our analytics plan: analytics guide.
Troubleshooting common problems
- Strong specular flare: Cause — direct lighting. Quick fix — soften lights, change angle, use polarizer. See common mistakes: mistakes guide.
- Color mismatch: Cause — wrong export color space. Quick fix — export in sRGB and check monitor calibration.
- Frame tilted in try-on: Cause — front-on shot not level. Quick fix — reshoot level front-on with horizon guide.
- Temples occluded by hair: Cause — hair covering temple. Quick fix — retake with hair tucked or supply temple shots.
- Edge halo / poor mask: Cause — busy background or low contrast. Quick fix — shoot on neutral background and supply masked PNG.
- Blurry close-ups: Cause — insufficient resolution or mis-focus. Quick fix — reshoot at higher resolution and ensure correct focus.
For deeper technical detail on landmarking, occlusion, and fit calibration see our accuracy deep-dive: accuracy deep-dive.
Shot list & sample capture workflow
Printable studio plan (per product SKU):
- Product-only (studio) — 60 minutes total: front (10m), 45L (5m), 45R (5m), profile L/R (10m), temple/top close-ups (10m), lens close-up (10m), masked export (10m).
- Model session — 45 minutes per model: straight-on (5m), 15–30° 3/4 L/R (10m), profile (5m), lighting swaps & color reference (10m), retakes & variations (15m).
- UGC pack — include selfie instruction card to email or present in checkout.
SEO & publishing tips for this article
- Title: include primary keyword in H1 and early paragraph.
- Use subheads with secondary keywords and LSI terms like “virtual fitting room,” “augmented reality shopping,” and “VTO for e-commerce.”
- Optimize image filenames and alt text to include keywords (see Moz image alt best practices: Moz on alt text).
- Offer a downloadable checklist/cheat sheet to increase dwell time and encourage shares.
Why tryitonme.com is the Right Fit for Your Business
- Zero-code, LINK-BASED deployment — no SDK or engineering lift required: tryitonme.com.
- Fast time-to-market — send product photos, tryitonme handles AR processing and returns a shareable try-on link in under 3 business days.
- Accessory-focused accuracy — built for eyewear, jewelry, watches, and hats with tailored VTO handling for temples, lenses, and occlusion.
- Flexible packaging — 6‑month packages organized by SKU quantity to match catalog scale.
Call-to-action & next steps
- Choose the 6‑month package based on your SKU count (see tryitonme).
- Prepare images per this guide—use the printable shot list below.
- Send standard product photos to tryitonme; their team/AI will process AR-ready assets.
- Receive your unique, ready-to-use try-on link and deploy across web, mobile, or social—NO SDK required and typically within 3 business days.
Appendix & resources
- ColorChecker / X‑Rite
- Polarizer primer — B&H
- Shopify product photography guide
- Portrait focal length primer — Cambridge in Colour
- sRGB vs AdobeRGB — Adobe
- Tryitonme — platform overview & demo/contact
Printable cheat sheet (quick)
- Masters: TIFF/PNG, 2–4k px.
- Web exports: sRGB JPEG, 1200–2000 px wide, quality 80–90.
- Must provide: front, 45L/R, profile L/R, temple, lens close-up, masked PNG.
- Selfie tip for UGC: natural light, hair tucked, neutral expression.
Minimal FAQ
Q: Can phone photos work?
A: Yes—if they follow lighting, framing, and focal guidance (avoid extreme wide-angle selfies). For best results use a phone at arm’s length in natural diffuse light and follow the selfie checklist above.
Q: Which file types should I upload as masters?
A: Upload lossless TIFF or PNG masters with embedded metadata plus one masked PNG/TIFF per SKU. Export web JPGs in sRGB 80–90% for delivery.
Q: How do I avoid reflections on lenses?
A: Use large, diffuse light sources, position lights off-axis (~45°), and consider a polarizing filter or cross-polarization in studio setups.
Q: What if frames sit tilted in try-on?
A: Most often the front-on shot is not level—reshoot the frontal image with a level horizon or replace with a re-leveled image and re-upload.
Q: How fast can I go live with tryitonme?
A: Tryitonme’s typical turnaround is under 3 business days after you submit the standard product photos and manifest. Book a demo at tryitonme.com.