
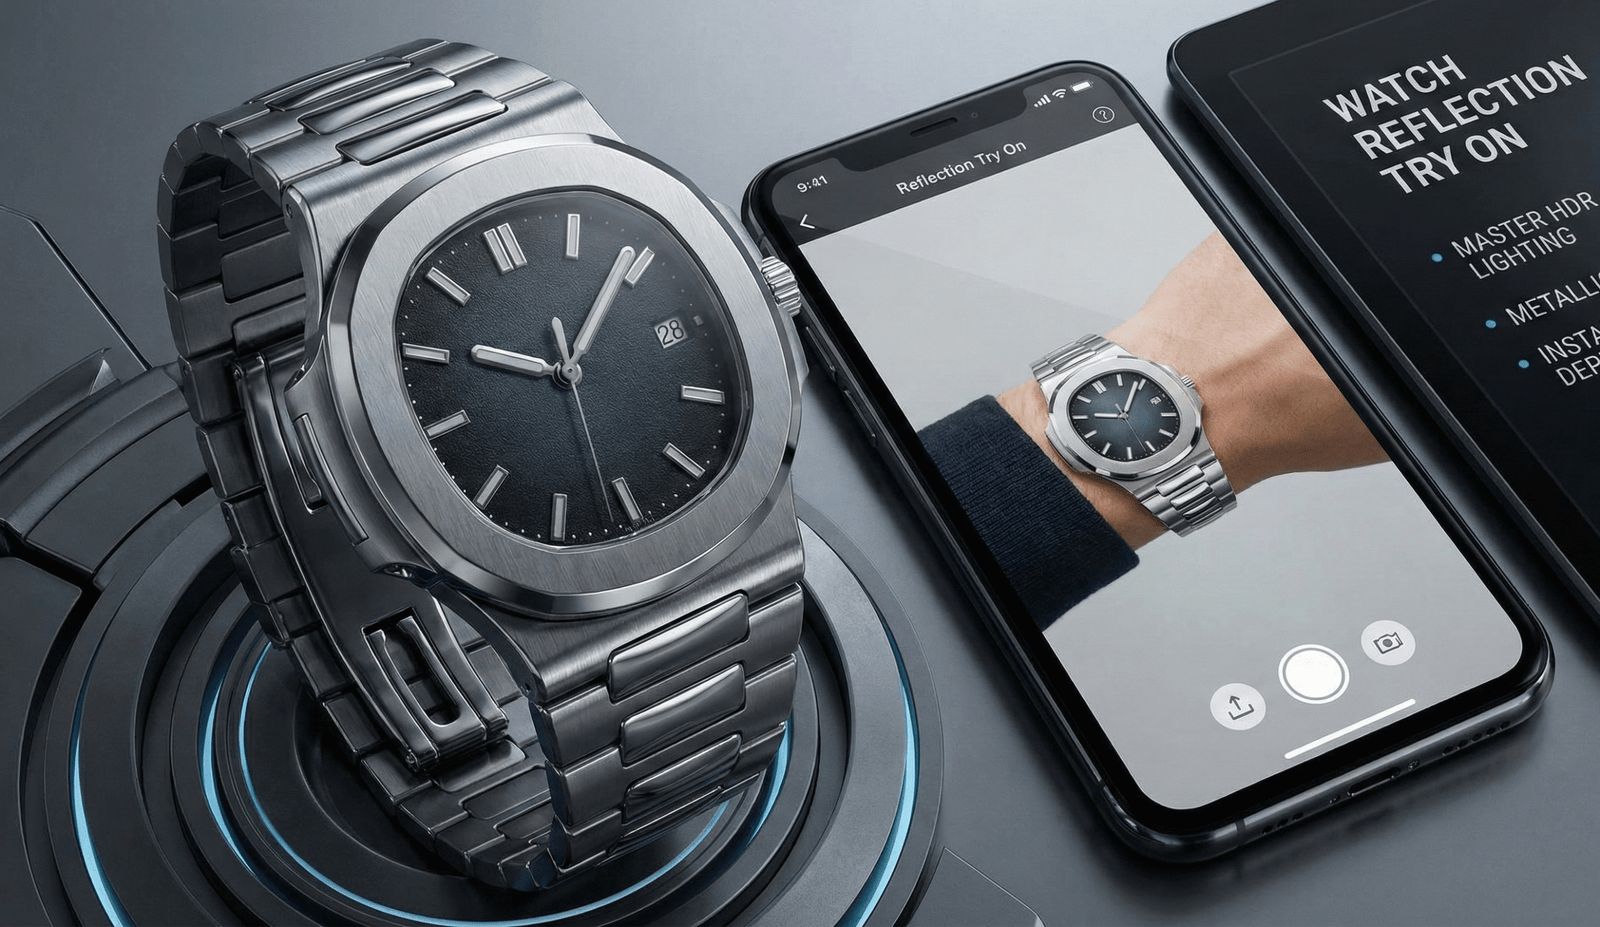
Watch Reflection Try On — Master HDR Lighting, Metallic PBR & Instant Deployment
Introduction — What this guide covers
You’ll learn how to create realistic watch reflections for a watch reflection try on using HDR lighting, metallic PBR materials, reflection controls — and how to deploy that photoreal try‑on instantly via
tryitonme.com. This guide covers the core concepts (HDRI/IBL/PMREM, Fresnel, roughness), a practical step‑by‑step workflow from asset to published link, copy/paste numeric presets, troubleshooting, QA, and performance tips.
See a short writeup on virtual watch try‑on here:
cermin.id/tryitonme-watches-virtual-tryon.
Quick Summary
- Select an HDRI based on contrast and color temperature; use PMREM for proper reflection blur.
- Set metallic=1 for metal, and use a roughness map for bezel-to-bracelet contrast.
- Unlock user-friendly reflection controls: HDR presets, environment rotation, and reflection intensity.
- Export to glTF/GLB with PMREM or create a server-side PMREM; quickly publish via tryitonme.
Why reflections matter for watch try‑on
Photoreal reflections change perceived product quality and buyer confidence.
A polished bezel that catches a controlled studio highlight reads as luxury; the same surface with flat, incorrect highlights reads toy‑like. That perception affects user trust and purchase likelihood.
For practical lighting examples and how highlights change across HDR environments, see this demo:
YouTube demo
and an eyewear reflection try‑on writeup:
cermin.id/eyewear-reflection-try-on.
Core concepts (quick reference definitions)
HDRI / HDR environment maps — why they matter
HDRIs are 360° high‑dynamic‑range images that capture the real world’s range of lights and colors; used as environment maps they create realistic reflections and highlights. See an HDR lighting tutorial:
Creative Shrimp HDR tutorial
and an HDR demo:
YouTube HDR demo.
Practical note: choose HDRI by contrast and color temperature to match your marketing photography (studio, daylight, or night).
Image‑Based Lighting (IBL) & PMREM
IBL uses HDRIs for scene lighting. PMREM (prefiltered mipmapped radiance environment map) prepares HDRIs into LODs that correctly blur reflections as roughness increases, avoiding noisy or wrong blurs across materials. Short explainer/demo:
PMREM demo.
Simple diagram idea: PMREM LOD 0 → sharp reflect for roughness=0; LOD 7 → fully blurred for high roughness.
HDR lighting try on (HDRI, IBL, PMREM)
Choose from HDR presets and rotate the environment to align studio highlights with the camera. Use 3 preset categories:
- Studio (softbox) — e‑commerce hero shots.
- Daylight (outdoor) — lifestyle / web banners.
- Urban Night (neon) — social ads and mood shots.
Examples and technique: see the Lightmap watch front tutorial:
Lightmap tutorial
and a PMREM/HDR workflow:
YouTube PMREM.
Metallic PBR try on (baseColor, metallic, roughness, normal, AO)
PBR maps physical channels to realistic behavior. Key channels:
- baseColor: surface tint (metals use a tinted baseColor).
- metallic: 0 (dielectric) to 1 (metal) — metals use metallic=1.
- roughness: controls highlight blur.
- normal: microdetails.
- AO: contact shadowing.
Watch‑specific note: metallic pbr try on demands metallic=1 for steel/gold parts and a carefully baked roughness map for bezel vs. bracelet contrast. See a PBR watch/material demo:
watch/material demo
and try‑on jewelry reference:
cermin.id jewelry VTO.
Fresnel, microfacet BRDF & anisotropy
Fresnel: reflections strengthen at grazing angles — important for bezel rims and crystal edges (see Lightmap tutorial:
Lightmap).
Microfacet BRDF models how micro‑surfaces scatter light; anisotropy simulates directional brushing on metal.
Tone mapping & exposure (HDR→LDR)
Tone mapping converts HDRI brightness into displayable LDR pixels. Small exposure tweaks (±1 stop) prevent clipping or underexposure. Technical overview:
tone mapping video.
Quick rule: start at 0 exposure, reduce by 0.5–1 stop if highlights clip; increase if the model looks too dark against background.
Practical workflow — From asset to published try‑on link
Asset prep (model, UVs, texture maps)
Checklist:
- Accurate geometry: case, crystal, hands, crown, bracelet/links.
- Separate objects for materials that differ (bezel, case, bracelet, crystal).
- Clean UVs: non‑overlapping where unique detail is required.
- Bake curvature & ambient occlusion to guide roughness maps.
- Normal maps for engraved details or brushed patterns.
Reference demo:
watch demo.
Lighting selection & HDRI presets
Rotate HDRI to align highlights with the camera, and label presets clearly in your UI. Examples:
HDR demo,
Lightmap tutorial.
Material setup: metallic parts, brushed/matte, glass/crystal
Stepwise:
- Metals: metallic = 1.0; baseColor = metal tint; roughness map controls polished vs. brushed areas.
- Brushed metal: use anisotropy 0.4–0.8 and a direction map for streaks.
- Glass/crystal: metallic = 0; roughness 0.0–0.05; IOR 1.5–1.6; clearcoat 0.02–0.1 for extra sheen.
See glass + PBR example:
YouTube example.
PMREM / prefilter generation & export
PMREM ensures the GPU reads the correct blurred reflection for any roughness. Generate 8 LODs (0–7). For glTF/GLB, include a prefiltered cubemap or generate PMREM server‑side during build. PMREM explainer:
PMREM demo.
Reflection controls to expose to end users
Recommended UI controls to expose:
- HDR preset selector (Studio / Daylight / Urban Night)
- Environment rotation (degrees)
- Reflection intensity / exposure slider
- Finish presets: Polished / Brushed / Matte
Example microcopy:
“Rotate environment” — adjusts highlight position; “Reflection intensity” — 0 (off) → 2 (strong); “Finish” — choose Polished / Brushed / Matte.
Export & test in tryitonme
Minimal export checklist:
- glTF / GLB file (metallic‑roughness workflow).
- Embedded textures (baseColor, metallicRoughness, normal, ao).
- Indexed materials per visible part.
Tryitonme sequence (product info):
- Create product in dashboard.
- Upload GLB.
- Assign maps and choose HDR presets.
- Publish → unique try‑on link (zero‑code, share anywhere).
Tryitonme home: tryitonme.com
Numeric tuning guide & presets (copy/paste values)
Use these ranges and presets as starting points. Tweak exposure and HDR rotation per scene.
Polished Bezel (Studio Polished)
- metallic: 1.0
- roughness: 0.02–0.08 (typical 0.05)
- anisotropy: 0.0
- envIntensity: 1.0
- glass: IOR 1.52, roughness 0.01, clearcoat 0.02
HDR recommendation: softbox_studio_01.hdr. Reference:
Lightmap.
Brushed Metal
- metallic: 1.0
- roughness: 0.25–0.45
- anisotropy: 0.5 (directional)
- envIntensity: 0.9
- HDR recommendation: daylight_overcast_01.hdr
Matte Case
- metallic: 0.9–1.0
- roughness: 0.5–0.8
- envIntensity: 0.6
- HDR recommendation: daylight_soft_02.hdr
Glass / Crystal
- metallic: 0.0
- roughness: 0.0–0.03
- IOR: 1.5–1.6
- clearcoat: 0.02–0.08
Example preset JSON (copy/paste)
{
  "name": "StudioPolished",
  "metallic": 1.0,
  "roughness": 0.05,
  "anisotropy": 0.0,
  "envIntensity": 1.0,
  "hdr": "softbox_studio_01.hdr",
  "glass": { "ior": 1.52, "roughness": 0.01, "clearcoat": 0.02 }
}
(Adapt field names to your engine or tryitonme dashboard format.)
Common reflection problems & fixes
- Overblown highlights
- Likely cause: HDR exposure too high or PMREM LOD too sharp.
- Fix: reduce HDR exposure by 0.5–1 stop; clamp specular; increase PMREM LOD. Reference:
YouTube
- Color cast from HDRI
- Likely cause: HDR white balance dominant.
- Fix: pick neutral HDRI or tint baseColor to compensate. See tone mapping:
tone mapping
- Reflections too sharp on mobile
- Likely cause: low PMREM or device rendering differences.
- Fix: raise roughness +0.1 for mobile, use lower LODs. Test per device:
PMREM test
- Black or dull glass
- Likely cause: IOR incorrect or env intensity too low.
- Fix: set glass IOR 1.5–1.6, increase envIntensity.
Performance & cross‑device considerations
– Use compressed HDR formats (RGBM) for mobile and lazy‑load HDR/PMREM.
– Generate lower PMREM LOD chains for weak devices and default to simpler presets.
– Limit texture sizes (2048→1024 for thumbnails; 4096 only for hero shots).
– glTF optimization: Draco compression for geometry, KTX2 / BasisU for textures. See mobile perf notes:
cermin.id mobile performance.
QA checklist & visual test gallery (what to visually verify)
Visual QA checklist:
- Preset shots: studio front, 45° daylight, silhouette backlight, neon night.
- Closeups: bezel edge, crystal, bracelet link, crown.
- Cross‑device: iPhone (Safari), Android (Chrome), desktop (Chrome/Firefox).
- Performance thresholds: FPS ≥ 30, initial load ≤ 3s on target network.
Reference visual examples:
YouTube examples.
Why tryitonme.com is the Right Fit for Your Business
- Zero‑code, shareable product links — drop try‑ons into web, mobile, or social without SDKs or APIs:
tryitonme.com - Fast onboarding workflow: purchase package → upload product photos → tryitonme team/AI handles AR processing → receive ready‑to‑use try‑on link.
More info: cermin.id pricing - Typical delivery SLA: unique try‑on link in under 3 business days:
tryitonme - Dashboard controls: HDR preset picker, reflection/roughness sliders, publish/replace links.
Book a Demo:
cermin.id demo
Example presets & case examples (quick copy/paste)
Studio Polished — values + use case
Use for hero product pages; polished bezel + softbox HDR. Values: metallic 1.0, roughness 0.05, envIntensity 1.0. HDR guidance: softbox_studio_01.hdr — see Lightmap example:
Lightmap.
Outdoor Daylight — values + use case
Use for lifestyle shots and product lists. Values: metallic 1.0, roughness 0.2, envIntensity 0.9. HDR guidance: daylight_clear_01.hdr. Reference:
YouTube.
Urban Night — values + use case
Use for social ads and mood creatives. Values: metallic 1.0, roughness 0.12, envIntensity 1.1, tint +10%. HDR guidance: city_neon_01.hdr. Creative example:
YouTube creative. HDRI libraries:
Poly Haven HDRIs
Visual assets to include in the post (design brief)
Required images/embeds:
- Before/after: no HDR vs. full HDR lighting try on.
- Demo GIF/embed of a tryitonme link (request live demo).
- Parameter overlays (preset cards with numeric values).
- PMREM diagram (LOD → roughness).
Request product team assets: tryitonme dashboard screenshots, demo product link, sample HDR files, before/after renders.
Measurement & success metrics to recommend
Recommended KPIs:
- Try‑on engagement (avg session time).
- Preset switches per session.
- Add‑to‑cart from try‑on sessions.
- Conversion uplift A/B tests (compare pages with vs. without try‑on).
Instrument tryitonme link analytics or your analytics platform to run short experiments.
Conclusion & clear CTA
You now have a practical roadmap to produce photoreal watch reflection try on experiences: choose HDRIs, map metallic PBR channels, generate PMREM, expose simple reflection controls, and publish fast using tryitonme’s zero‑code, link‑based system. Ready to test a live sample? Try a demo link on
tryitonme.com and request the preset JSONs / downloadable checklist to speed your first deploy.
Appendices & resources (downloads & glossary)
Downloads to include (request from product team): Preset JSONs (StudioPolished, Brushed, UrbanNight), HDRI pack samples, QA checklist PDF.
Glossary & resources:
Production notes & final checklist for publishing
- Confirm H1 contains “watch reflection try on” and the phrase appears within the first 150 words.
- Ensure subheads include “metallic pbr try on” and “hdr lighting try on” early in the post.
- Add tryitonme dashboard screenshots + a live demo link (request from product team).
- Tag any numeric claims without external verification as “(no reliable source)”.
- Include alt text for all images (e.g., “Polished bezel in watch reflection try on preset”).
- Wordcount target: 1,200–2,000 words + visuals.
- Assets required before publish: demo tryitonme link, dashboard screenshots, HDR samples, before/after renders.
FAQ
1. How do I export a glTF/GLB correctly for tryitonme?
Export using the metallic‑roughness workflow, embed baseColor, metallicRoughness, normal and AO maps, and include separate materials for visible parts. If possible, include a prefiltered PMREM cubemap or ensure your build generates PMREM server‑side.
2. What is PMREM and why do I need it?
PMREM is a prefiltered mipmapped radiance environment map that provides correctly blurred reflections per material roughness. Without it, reflections can be noisy or incorrectly sharp as roughness increases.
3. How can I make reflections look good on mobile without heavy performance cost?
Use compressed HDR formats (RGBM), lazy‑load HDR/PMREM, generate smaller PMREM LOD chains for weak devices, limit texture sizes, and bump roughness slightly for mobile to hide LOD differences. Consider KTX2 / BasisU for textures and Draco for geometry.
4. Can users edit HDR rotation and intensity at runtime?
Yes — expose environment rotation (degrees), HDR preset selector, and reflection intensity/exposure sliders in the UI so users can reposition highlights and tune the look in real time.
5. How fast can I publish a link via tryitonme?
According to product info, tryitonme supports zero‑code publishing and can deliver a unique try‑on link in under 3 business days for standard workflows. For onboarding and pricing details, visit tryitonme.com.